How to Add a Contact Form in WordPress
Docswrite Team
Oct 11, 2024
3 min read

How to Add a Contact Form in WordPress
Creating a contact form on your WordPress website is a vital step in enhancing communication with your audience. A contact form allows visitors to reach out easily, providing you with valuable feedback, inquiries, and more. In this guide, we’ll walk you through the steps to add a contact form to your WordPress site, ensuring it is both effective and user-friendly.
Step 1: Choose a Contact Form Plugin
Before you can add a contact form, you need to select a suitable plugin. While WordPress has built-in form options, plugins like Contact Form 7, WPForms, and Ninja Forms offer more features and flexibility. For this tutorial, we’ll use Contact Form 7 due to its popularity and ease of use.
Step 2: Install and Activate the Plugin
-
Log in to your WordPress Dashboard.
-
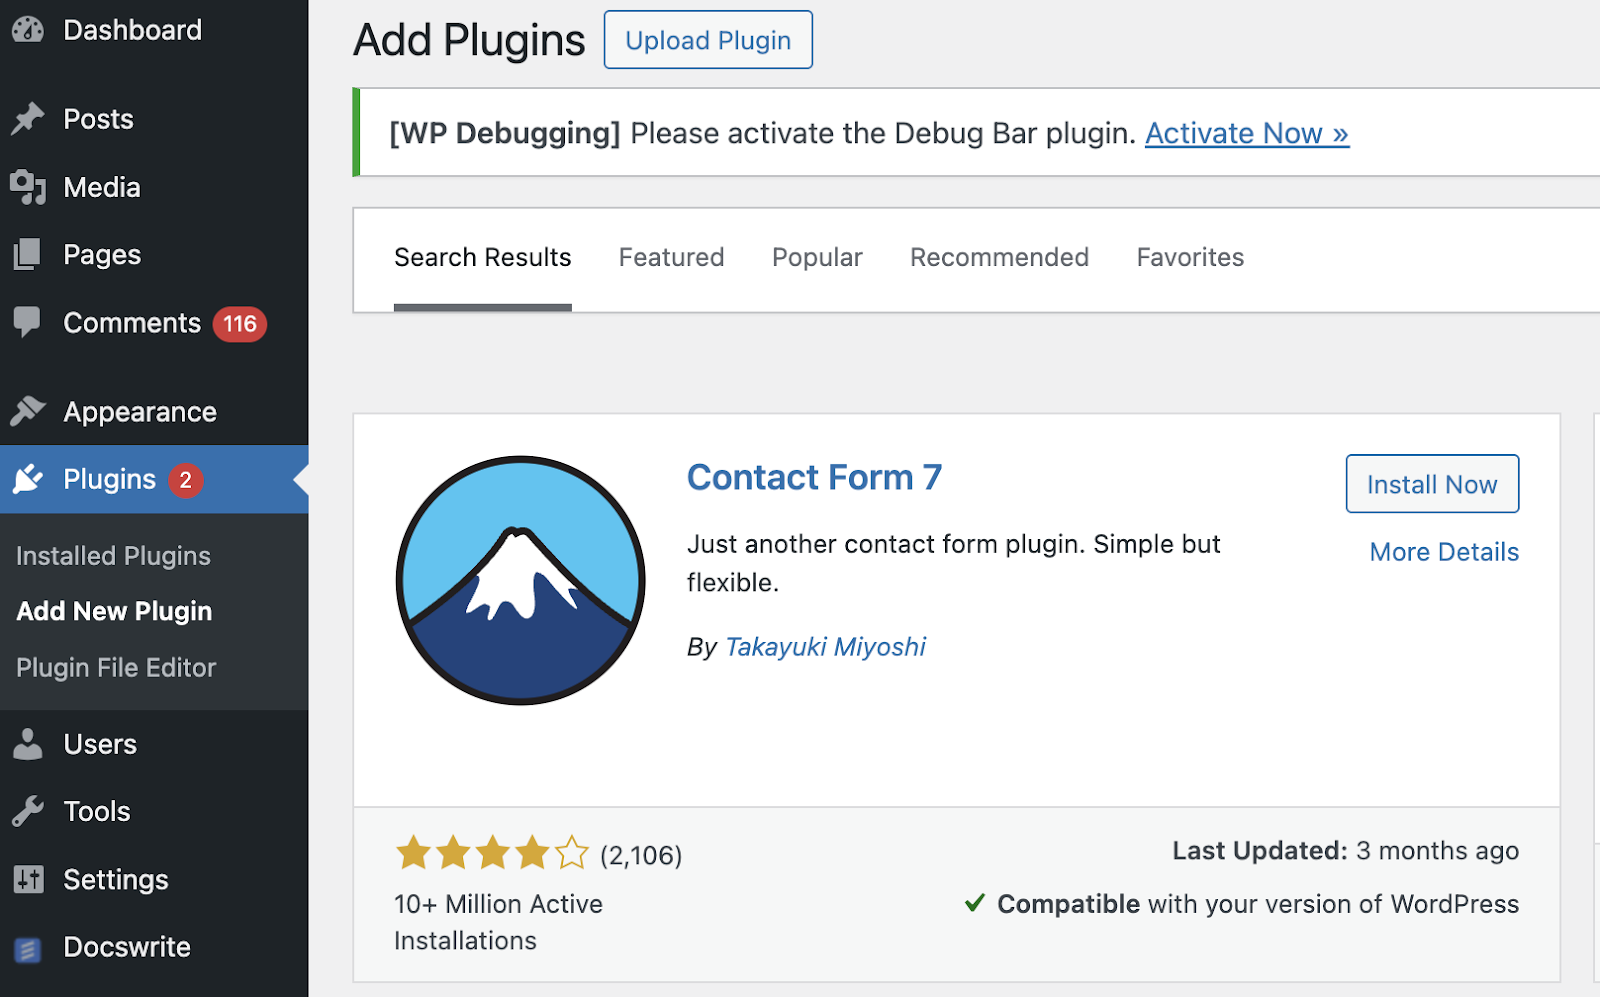
Navigate to Plugins > Add New.
-
In the search bar, type Contact Form 7.
-
Click the Install Now button next to the plugin.
-
Once installed, click Activate to enable the plugin.
Step 3: Create Your First Contact Form
-
After activation, go to Contact > Contact Forms in your dashboard.
-
Click on Add New to create a new form.
-
You’ll see a default form template, which you can customize. Add fields like Name, Email, Subject, and Message.
-
Adjust any settings as needed (e.g., form instructions, placeholder text).
-
Once you’re satisfied, click Save.
Step 4: Configure Email Settings
-
After saving your form, scroll down to the Mail tab.
-
Here, you can configure where the form submissions will be sent. Enter the email address you want to receive messages at.
-
Customize the email subject line and message body if needed.
-
Click Save once you finish configuring the settings.
Step 5: Add the Form to Your Website
-
After saving, you will see a shortcode at the top of the form editor. It looks something like this: [contact-form-7 id="1234" title="Contact form 1"].
-
Copy this shortcode.
-
Go to the page or post where you want the form to appear.
-
Paste the shortcode into the content area where you want the form to display.
-
Publish or update your page/post.
Step 6: Test the Form
-
Visit the page where you added the contact form.
-
Fill in the fields with test information and submit the form.
-
Check your email to ensure you receive the message.
FAQs
Q1: Can I customize the appearance of the contact form?A1: Yes, many contact form plugins, including Contact Form 7, allow you to customize the appearance using CSS or by choosing different themes.
Q2: Are there any security measures for contact forms?A2: Yes, plugins often include spam protection features such as CAPTCHA or Akismet integration to prevent spam submissions.
Q3: How can I add more fields to my contact form?A3: You can add fields directly in the form editor of your chosen plugin. Most plugins provide a simple interface for adding various field types like dropdowns, checkboxes, and more.
Q4: Can I receive submissions in multiple email addresses?A4: Yes, you can separate multiple email addresses with a comma in the "To" field under the Mail settings.
Q5: What if I encounter issues with form submissions?A5: Check your email settings and spam folder. Additionally, ensure your WordPress site is correctly configured to send emails.
← Back to Blog